On the Project Settings page, you can change the details and status of your project, edit languages, manage the users and share the project with another organization. Only those who have Project Admin status of the selected project or an Organization Admin of the selected Organization can access this page.
► Editing details of the project
To edit Name, Countries, Description, Theme, Budget, Currency, or Donor of the project, use the “Edit” button next to the name of the project and then select “UPDATE”.
► Changing languages of the project
To edit the languages used in your project, use the “Edit” button next to the name of the project, select the required languages in the field “Languages” by starting to type the name of the translated language and clicking on it once it appears below, then select “UPDATE”. This step can be used to add manual translations on certain pages.
► Managing users from your organization in the project
To add an existing user from your organization to a specific project, click the “+ User”. You can then select the user to be added and the membership type (project admin or member).
To invite someone new to join your project, click “+ Invite” above the list of the users. Add their email and check “Project Admin” if you wish the new user to be a Project Admin. The invited user will automatically be added to your organization as well.
To remove the user from the project, click on the “Remove from Project” next to their name and click “Confirm”. The removed users will continue being members of other projects within your organization.
To change the status (project admin/member) of the user, click on the user’s name and the membership details will appear. You can select the required status and click “Update”.
► Sharing the project with another organization
To share a project with another organization, click “Share” next to the name of the project, and enter the name of the organization.
The organization will have ‘View Only’ abilities unless you select “Allow Edit” to let the organization have editing privileges to the project.
Tip: You can use the Share Project function to create complex organizational structures. For example, you can have an umbrella organization which can oversee projects created by several local branches.
Click “Request Sharing” and your request will be sent to the Kinaki Team to finalize the sharing of your project.
► Copying a project
For various reasons, you might want to make a copy of a Project you have been working on. For example, you have the basic Data Collection Tools (DCTs) set-up, and you want to copy the Project for another country team and make individual adjustments, without redoing the initial work.
If you have been working on a Project and want to copy it for another country team, Kinaki can help you with that!
Projects can be copied from Organization Settings or Project Settings.
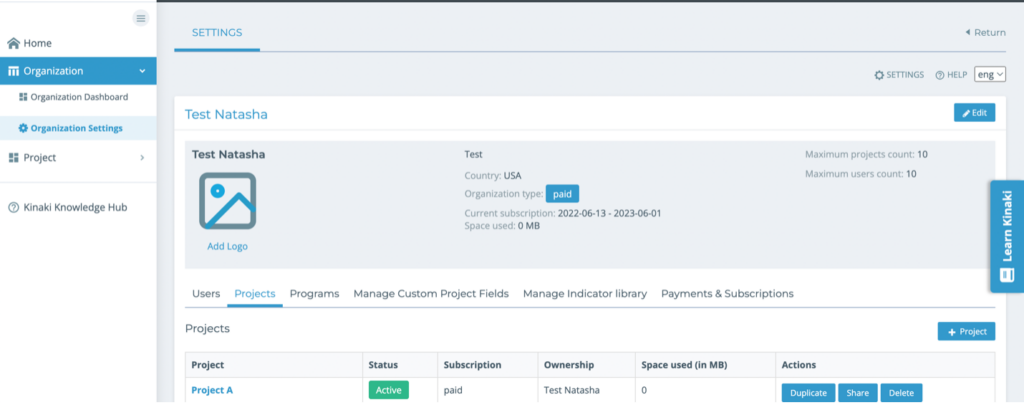
From Organization Settings: Click on “Organization” from the main menu on the left and click on “Organization Settings”. Under the “Projects” tab on this page, you will see a list of all your projects. From the “Actions” column, choose “Duplicate”.
From Project Settings: Click on “Project” from the main menu on the left and click on “Project Settings”. On the right hand side of the page next to “Share” and “Edit”, click on “Duplicate“.
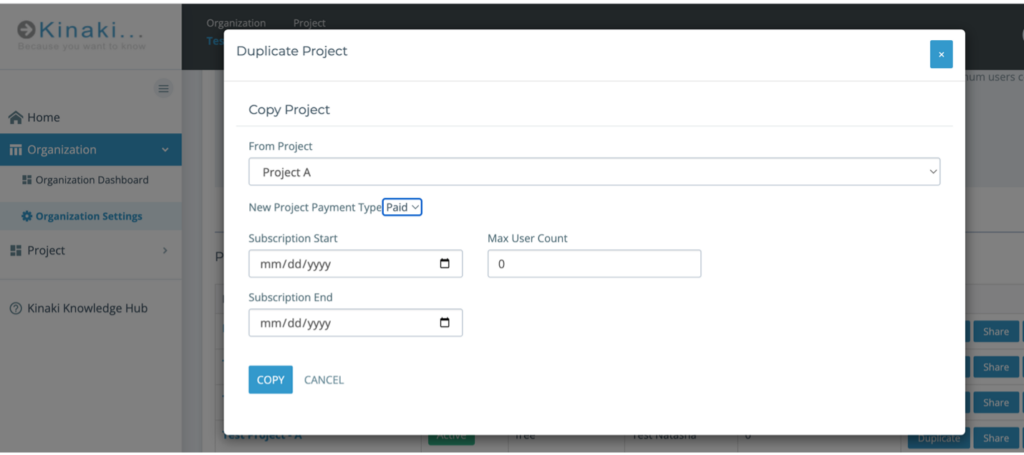
It might take a few seconds for the pop- up menu to appear. You can choose the project you want to copy from the drop-down menu, fill in the details and click on “Copy”. Be sure to Increase the “Max User Count” from 0 or you won’t be able to add any Users.
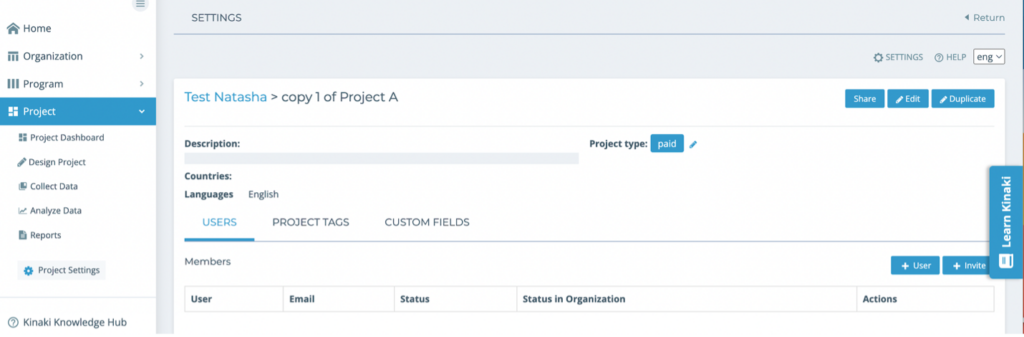
Now you will be able to see the project in the list of projects titled ‘copy 1 of Project XYZ’.

Click on the name of the project, and on this new page, go to “Edit”.
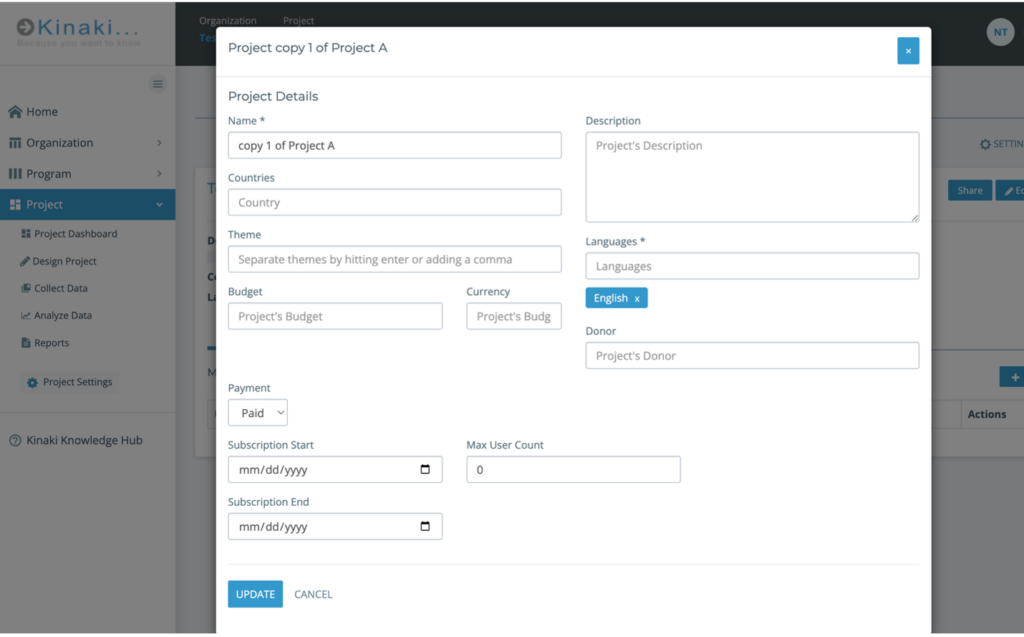
A new window will appear. Change project details, like the name of the project, country etc. and click on “Update”. That’s it! You have created a copy of your project.
► Video: Settings Tutorial
Check out Chapter 4 of this video to learn more!