There are two ways you can add activities to your project.
The first way is to list your activities right in your Project Logic.
To do this, add a new level to the Project Logic from the Project Settings page.
Then add your Activities as a Result Statement, in the same way as you would your Outputs and Outcomes. You can drag-and-drop your activities underneath your Outputs.
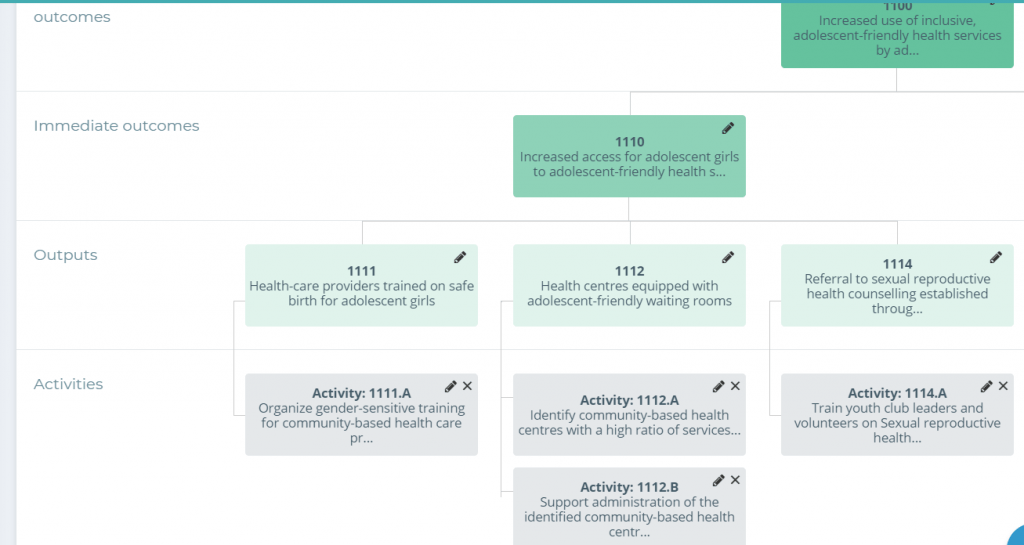
Another way you can add activities is to add them as indicators to your Outputs.
This is our recommended route, as you can then see the activity status contribute directly to the Output they are connected to – and activities themselves don’t necessarily need their own indicators – that they are complete or not (their status) is what matters.
Here’s how we suggest you do it:
- Go to the Indicators page.
- Select “Add new Indicator”.
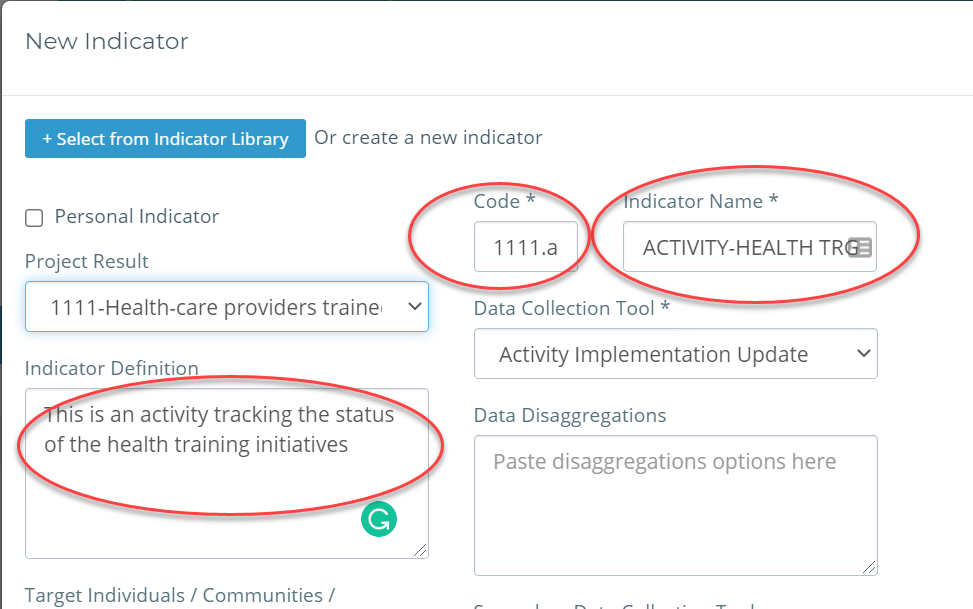
- In the code, write the Output code, and add the letter .a after it.
This means your first Output Indicator will be labeled 1111.a, instead of 1111.1. This letter signifies that it is actually an activity, not an indicator.
In the Indicator name, write “Activity” and what it is. For example, “Activity – Health Training“.
For the Data Collection Tool, either select (or create) “Activity Tracking” or “Activity Implementation Update”
Fill in the remainder of the details in the fields as you would for any other indicator. Include in the description that this is activity tracking.
Now you can check out your new Activity rows on the MEL Design page and on your Indicators page.